Dateline: 2 August 2007
Updated: 10 April 2013
Updated: 10 April 2013
When I first started growing garlic, I waited until most of the plant was dead and brown. Big mistake. You can do that with onions, but not garlic. If you wait that long to harvest your garlic, the bulbs will be split open and the papery bulb wrappers will be rotted off. Better to err on the side of harvesting a tad early than a tad late. That’s my recommendation.
When I harvest my garlic crop I feel as though I am doing something special, that I am participating in a significant event. In a miracle of creation, each bulb I harvest has developed from a single seed clove I planted 9 months ago. Down, out of sight, in the earth, the small clove developed into a full bulb. Amazing.
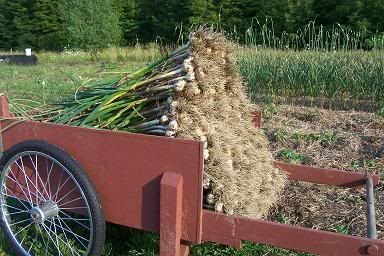
Here’s a picture of my homemade Whizbang Garden Cart with a load of just-pulled-from-the-earth garlic:
I used to tie my harvested garlic in bunches and hang them to dry. But it takes a long time to dry that way and sometimes, if drying conditions are not good, mold will develop. That being the case, last year I came up with a nifty new garlic bulb dryer to cure my garlic (see link below for more information).
So now, immediately after harvesting the bulbs, I cut the green tops away and layer the bulbs in my new dryer. This next picture shows the tool I use for separating the tops from the bulbs:
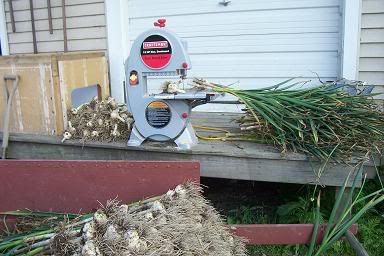
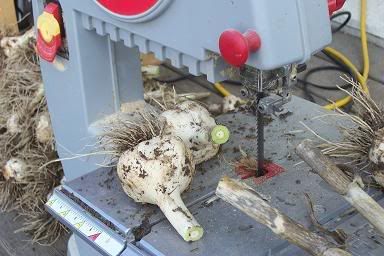
That inexpensive little benchtop band saw has proven very useful around here. In addition to cutting garlic bulbs, we have used it to slice bricks of Marlene’s homemade soap into bar size. And my kids are always using it to cut wood pieces for some project they are working on. After the bulbs have cured for a week or so in the dryer, I will use the saw to trim the roots off each bulb. Here’s a close-up picture of the bandsawn garlic:
And finally, here’s another shot of the garden cart with a big load of fresh-picked garlic:
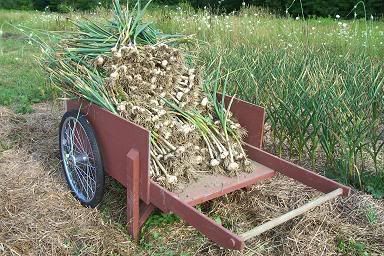
Boy, that Whizbang Garden Cart sure is a handy tool around the homestead! :-)
===============
I invite you to read my other garlic-related blog essays:
How I Plant My Garlic
Curing Garlic Bulbs
Making Pickled Garlic Scapes
Home-Based Agrarian Enterprises & Garlic Powder Profits
Selling My Garlic Powder At The Farmer’s Market


.JPG)
.JPG)


.JPG)

.JPG)


.JPG)


1 comment:
Herrick, I usually wait until the tops dry before i cut the tops off the garlic but your way seems much easier and less space consuming.Do you loose any flavor or size by cutting them off when they are green? I have your book "Making Great Garlic Powder" a find it very helpful.My wife and I live about 20 miles east of Syracuse and have vegetable gardens and chickens and are having a great time on our homestead.We frequently stop at New Hope Mills and were wondering if you would mind if we stopped and saw your gardens in the summer of 2010.
Post a Comment