Back in the days when agriculture was the predominant culture, when entire families worked together on their land to provide for themselves, when there were no WalMarts or supermarkets or Toys-R-Us to provide our every necessity (and an endless supply of non-necessities), back in those days people simply produced almost everything they needed themselves. And what few things they didn’t produce, they procured by trading with someone in their community.
The people who lived like this were the yeoman farmer, farmsteader, and homesteader families. They cleared and planted their land. They harvested crops for food and trade. They raised animals for food and trade and transportation, and to help them work the land. They put up their own food and cooked their meals from scratch. They heated their homes and cooked with their own firewood. They made their own clothes and quilts, and ox carts and toys and musical instruments. They were craftsmen of necessity. They built their own barns and homes, and furniture too.
Though I am far from a yeoman, I am inspired by the example of the yeoman’s approach to life. I love the idea of learning different skills, and of working with my hands to create things that my family needs. I love the idea of not needing the supermarkets and the department stores. This idea of using the time, strength, mind, and abilities God gave me to provide for myself, for my family, and, at times, for my community, without needing the help of government agencies or the industrial providers is the embodiment of freedom. It is the outward expression of Paul’s admonition to the church at Thessalonica, as written in 1 Thessalonians 4:11-12
Make it your ambition to lead a quiet life, to mind your own business and to work with your hands, just as we told you, so that your daily life may win the respect of outsiders and so that you will not be dependent on anybody.
All of which brings me to my new wood box.....

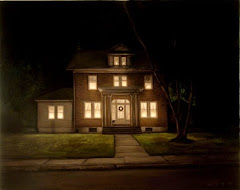
I built an addition on my home over the past two years. It is finally finished and the wood box in the picture above sits in one corner of the new room.
Just around the corner on the other side of the wall, is our woodstove. It’s an Old Vermont Castings stove I bought used 20 years ago for $250. That stove has been, and continues to be, the only source of heat in our house.
If I had sufficient woodland, I would cut my own firewood. I love to cut firewood. As it is, I cut some when it is available but purchase most all my wood from Kevin, a bachelor neighbor who has a small diary farm and firewood business. Every year I buy 10 face cord of firewood from Kevin. He delivers it with his old Allis Chalmers tractor using an old manure spreader converted into a wagon.
If I’m home when he delivers the several loads, I’ll go help him throw the wood off into a big pile in my side yard. Then I pay him cash. For the last several years he has charged me $35 a face cord. This year he upped his price to $45 and I was glad to see it.
Some of my friends and neighbors will spend more than $450 a month to heat their big houses with fuel oil or kerosene or propane, or electricity through the frigid New York winter that is quickly approaching. But my family will be warm and snug in our small home for substantially less money. We are not dependent on any foreign country for our heating fuel. We will not need any furnace repair man to keep our heating system operational. We will not need to buy a new furnace when the old one gets obsolete or run down; the woodstove should serve us just fine for another 20 years. And, incredibly, that $450 of firewood will not only last us through the winter, it will fuel the woodstove in my workshop when I need to warm it up, and it will be sufficient to fuel our makeshift maple syrup evaporator when we boil down a few gallons in the backyard next spring.
But I am heading off on a rabbit trail. This story is about my wood box....
Outside the window that is right next to the wood box is our winter woodpile. Kevin’s wood is split and seasoned for a year, but much of it is in big split chunks. So I pay my son Robert $75 to go through the pile and re-split it into more-convenient-to-handle and easier-to-fit-into-the-woodstove pieces. We used to rent a hydraulic wood splitter and the whole family worked together to get it split in one day. But two years ago, Robert asked me if I would pay him what it cost to rent the splitter if he did the splitting himself with a splitting maul. As you might imagine, such a request was like music to my ears. It brought joy into the heart of this pseudo-yeoman father!


Robert splits the wood, and the rest of us stack it into a makeshift firewood lean-to that I built a few years ago using a bunch of cheap pressure treated 4x4 posts and 2x pine boards (priced cheap because the wood was so warped that the lumberyard couldn’t sell unless it was cheap) and some galvanized roofing that came from my dad’s barn, which fell down several years ago. It was never intended to be a permanent structure, just a cheap and adequate place to stack firewood and that is what it has been.
So we have the firewood just outside the window and the wood box just inside. (Oh, by the way, the window was also purchased from the local lumberyard at a reduced price—$40—because it had once been a display model.) Our system for getting firewood in the house is for one person (typically my son James) to go outside and hand it through the opened window to another person, who places it in the wood box. The inside dimensions of the box measure 18” deep (firewood lengths are 16 to 18 inches) by 38 “ wide by 36” high. That much wood is enough to last us for several days even in the coldest part of winter.
I made the wood box two weeks ago using 1 x 10 pine boards. My son Robert helped me and got to see that a man doesn’t have to go buy furniture from a store. He can just make it. I told Robert that there was no reason why he couldn’t make most all the furniture in his home someday, not to mention the house itself. And, I told him that the furniture he made would be more unique and special to him and his family, not to mention future generations.
I confess that I have not made all the furniture in my house. But I have made quite a few pieces and I plan to make more in the days ahead. Fact is, I’d like to start a home business making furniture. That was part of the plan I had in the back of my mind for the big old Grange hall we had hoped to buy last summer (see previous posts for the whole story on that). Frankly, I’d like to start all kinds of home businesses, but I already have several part time home businesses! What a dilemma.
Anyway, Marlene and I like furniture styles that fall into the country, shaker, or primitive category. That should come as no surprise, Such furniture is, essentially, agrarian. I like to think of it as yeoman. That is the name I wanted to give my home and hand-crafted furniture company: Yeoman Furniture. Maybe someday yet.
Yeoman furniture is far easier to build than, say, Federal, or Queen Anne. Those high fallutin’ furniture styles require special woods and finishes and joinery skills. Yeoman furniture is built using very basic materials and tools and skills. And the beauty of yeoman furniture is that if it gets a little banged up, it looks better. A little “distress” is actually preferable. If a board cracks from expansion and contraction of the wood, that’s okay too. It doesn’t mean the piece will fall apart. Not hardly. Yeoman furniture is solidly built. Oh, but it is attractive too! Functionality and durability without being attractive to the eye is not my idea of good Yeoman furniture.
Years ago, when I was writing how-to books for The Taunton Press, I had an idea for a book that I wanted to call, The Practical Cabinetmaker. It was an anti-big-tools-and-fancy-shop how-to book. It seemed to me that every cabinetmaking book on the market required the reader to own expensive tools and a big shop. My book would tell people how to build beautiful cabinets without a lot of expensive shop tools. The book never happened.
The fact is, you don’t need a jointer, or a planer, or a radial arm saw, or even a table saw (though a small, portable, inexpensive, table saw comes in handy). The fact is, you can build real nice cabinets using nothing more than basic power hand tools— power saw, an electric drill, and some basic hand tools would pretty much get you going. In other words, the same tools you’d use to build your barn and your house.
And you don’t need a fancy shop either. I built the cabinets for my kitchen in the kitchen when I built the house. I’ve build other cabinets outside under the roof of a shed I once had. Now I have a shop but it is cluttered and cramped, yet I can still make cabinets there.
The same applies to furniture. Maybe someday I’ll make a video or two showing myself making furniture with basic tools and basic techniques in my very crowded shop. It would, no doubt, be comical as I tripped over the junk around my work table. I would be the furniture making contrarian. Furnituremaking purists would laugh and howl insults at me. But your average unskilled person would love my instructional videos because they show how to make beautiful and useful pieces without all the stuff and bother. There I go again, Walter Mitty-like dreaming of another home business. I just can’t help myself. :-)
Back to my new wood box.... Like I said, I built it out of 1x 10 pine boards. I built it to fit in the corner by the window. I built it in less than 8 hours over a period of several days. I built it without any plans; just a vision in my mind. When I was done I decided to finish it with milk paint. That’s the finish that many a yeoman might have used. I’ve used it before and I absolutely love milk paint. My understanding is that milk paint is made with milk, lime and pigment. It is incredibly durable. I bought powdered milk paint mix (just add water) from an internet company. Lexington Green is the color. One of the really nice things about milk paint is that it has no volatile solvents. it’s very natural and safe to use (though it can be caustic with the lime).
I painted two coats of milk paint on the box (the inside was stained because I wasn’t sure if I would have enough paint to cover the inside and I like the color contrast anyway). Milk paint is very dull and drab looking and it goes on kind of lumpy— very unlike modern paint from a can. It could be left that way but I decided to take the finish a step further. After the paint was dry (it dries fast) I poured boiled linseed oil (You buy it that way. I did not boil it.) on each surface and rubbed it with some very fine wet/dry sandpaper on a sanding block. This step smoothed the painted surface, sealed it, and darkened it. The sandpaper also distressed the surface by rubbing paint off in some areas, as shown in this next picture.

Thus finished, the outside of the wood box is now silky smooth to the touch. James told me that Pa Ingalls used to use linseed oil to finish furniture followed by some bees wax, but I’m going to leave it as it is.
For my next project, I’m working on the room seen beyond the wood box in the first picture above. I need to put a fresh coat of paint on the ceiling and wallpaper the walls. In fact, that’s what I’m going to go do right now.......
The people who lived like this were the yeoman farmer, farmsteader, and homesteader families. They cleared and planted their land. They harvested crops for food and trade. They raised animals for food and trade and transportation, and to help them work the land. They put up their own food and cooked their meals from scratch. They heated their homes and cooked with their own firewood. They made their own clothes and quilts, and ox carts and toys and musical instruments. They were craftsmen of necessity. They built their own barns and homes, and furniture too.
Though I am far from a yeoman, I am inspired by the example of the yeoman’s approach to life. I love the idea of learning different skills, and of working with my hands to create things that my family needs. I love the idea of not needing the supermarkets and the department stores. This idea of using the time, strength, mind, and abilities God gave me to provide for myself, for my family, and, at times, for my community, without needing the help of government agencies or the industrial providers is the embodiment of freedom. It is the outward expression of Paul’s admonition to the church at Thessalonica, as written in 1 Thessalonians 4:11-12
Make it your ambition to lead a quiet life, to mind your own business and to work with your hands, just as we told you, so that your daily life may win the respect of outsiders and so that you will not be dependent on anybody.
All of which brings me to my new wood box.....
I built an addition on my home over the past two years. It is finally finished and the wood box in the picture above sits in one corner of the new room.
Just around the corner on the other side of the wall, is our woodstove. It’s an Old Vermont Castings stove I bought used 20 years ago for $250. That stove has been, and continues to be, the only source of heat in our house.
If I had sufficient woodland, I would cut my own firewood. I love to cut firewood. As it is, I cut some when it is available but purchase most all my wood from Kevin, a bachelor neighbor who has a small diary farm and firewood business. Every year I buy 10 face cord of firewood from Kevin. He delivers it with his old Allis Chalmers tractor using an old manure spreader converted into a wagon.
If I’m home when he delivers the several loads, I’ll go help him throw the wood off into a big pile in my side yard. Then I pay him cash. For the last several years he has charged me $35 a face cord. This year he upped his price to $45 and I was glad to see it.
Some of my friends and neighbors will spend more than $450 a month to heat their big houses with fuel oil or kerosene or propane, or electricity through the frigid New York winter that is quickly approaching. But my family will be warm and snug in our small home for substantially less money. We are not dependent on any foreign country for our heating fuel. We will not need any furnace repair man to keep our heating system operational. We will not need to buy a new furnace when the old one gets obsolete or run down; the woodstove should serve us just fine for another 20 years. And, incredibly, that $450 of firewood will not only last us through the winter, it will fuel the woodstove in my workshop when I need to warm it up, and it will be sufficient to fuel our makeshift maple syrup evaporator when we boil down a few gallons in the backyard next spring.
But I am heading off on a rabbit trail. This story is about my wood box....
Outside the window that is right next to the wood box is our winter woodpile. Kevin’s wood is split and seasoned for a year, but much of it is in big split chunks. So I pay my son Robert $75 to go through the pile and re-split it into more-convenient-to-handle and easier-to-fit-into-the-woodstove pieces. We used to rent a hydraulic wood splitter and the whole family worked together to get it split in one day. But two years ago, Robert asked me if I would pay him what it cost to rent the splitter if he did the splitting himself with a splitting maul. As you might imagine, such a request was like music to my ears. It brought joy into the heart of this pseudo-yeoman father!
Robert splits the wood, and the rest of us stack it into a makeshift firewood lean-to that I built a few years ago using a bunch of cheap pressure treated 4x4 posts and 2x pine boards (priced cheap because the wood was so warped that the lumberyard couldn’t sell unless it was cheap) and some galvanized roofing that came from my dad’s barn, which fell down several years ago. It was never intended to be a permanent structure, just a cheap and adequate place to stack firewood and that is what it has been.
So we have the firewood just outside the window and the wood box just inside. (Oh, by the way, the window was also purchased from the local lumberyard at a reduced price—$40—because it had once been a display model.) Our system for getting firewood in the house is for one person (typically my son James) to go outside and hand it through the opened window to another person, who places it in the wood box. The inside dimensions of the box measure 18” deep (firewood lengths are 16 to 18 inches) by 38 “ wide by 36” high. That much wood is enough to last us for several days even in the coldest part of winter.
I made the wood box two weeks ago using 1 x 10 pine boards. My son Robert helped me and got to see that a man doesn’t have to go buy furniture from a store. He can just make it. I told Robert that there was no reason why he couldn’t make most all the furniture in his home someday, not to mention the house itself. And, I told him that the furniture he made would be more unique and special to him and his family, not to mention future generations.
I confess that I have not made all the furniture in my house. But I have made quite a few pieces and I plan to make more in the days ahead. Fact is, I’d like to start a home business making furniture. That was part of the plan I had in the back of my mind for the big old Grange hall we had hoped to buy last summer (see previous posts for the whole story on that). Frankly, I’d like to start all kinds of home businesses, but I already have several part time home businesses! What a dilemma.
Anyway, Marlene and I like furniture styles that fall into the country, shaker, or primitive category. That should come as no surprise, Such furniture is, essentially, agrarian. I like to think of it as yeoman. That is the name I wanted to give my home and hand-crafted furniture company: Yeoman Furniture. Maybe someday yet.
Yeoman furniture is far easier to build than, say, Federal, or Queen Anne. Those high fallutin’ furniture styles require special woods and finishes and joinery skills. Yeoman furniture is built using very basic materials and tools and skills. And the beauty of yeoman furniture is that if it gets a little banged up, it looks better. A little “distress” is actually preferable. If a board cracks from expansion and contraction of the wood, that’s okay too. It doesn’t mean the piece will fall apart. Not hardly. Yeoman furniture is solidly built. Oh, but it is attractive too! Functionality and durability without being attractive to the eye is not my idea of good Yeoman furniture.
Years ago, when I was writing how-to books for The Taunton Press, I had an idea for a book that I wanted to call, The Practical Cabinetmaker. It was an anti-big-tools-and-fancy-shop how-to book. It seemed to me that every cabinetmaking book on the market required the reader to own expensive tools and a big shop. My book would tell people how to build beautiful cabinets without a lot of expensive shop tools. The book never happened.
The fact is, you don’t need a jointer, or a planer, or a radial arm saw, or even a table saw (though a small, portable, inexpensive, table saw comes in handy). The fact is, you can build real nice cabinets using nothing more than basic power hand tools— power saw, an electric drill, and some basic hand tools would pretty much get you going. In other words, the same tools you’d use to build your barn and your house.
And you don’t need a fancy shop either. I built the cabinets for my kitchen in the kitchen when I built the house. I’ve build other cabinets outside under the roof of a shed I once had. Now I have a shop but it is cluttered and cramped, yet I can still make cabinets there.
The same applies to furniture. Maybe someday I’ll make a video or two showing myself making furniture with basic tools and basic techniques in my very crowded shop. It would, no doubt, be comical as I tripped over the junk around my work table. I would be the furniture making contrarian. Furnituremaking purists would laugh and howl insults at me. But your average unskilled person would love my instructional videos because they show how to make beautiful and useful pieces without all the stuff and bother. There I go again, Walter Mitty-like dreaming of another home business. I just can’t help myself. :-)
Back to my new wood box.... Like I said, I built it out of 1x 10 pine boards. I built it to fit in the corner by the window. I built it in less than 8 hours over a period of several days. I built it without any plans; just a vision in my mind. When I was done I decided to finish it with milk paint. That’s the finish that many a yeoman might have used. I’ve used it before and I absolutely love milk paint. My understanding is that milk paint is made with milk, lime and pigment. It is incredibly durable. I bought powdered milk paint mix (just add water) from an internet company. Lexington Green is the color. One of the really nice things about milk paint is that it has no volatile solvents. it’s very natural and safe to use (though it can be caustic with the lime).
I painted two coats of milk paint on the box (the inside was stained because I wasn’t sure if I would have enough paint to cover the inside and I like the color contrast anyway). Milk paint is very dull and drab looking and it goes on kind of lumpy— very unlike modern paint from a can. It could be left that way but I decided to take the finish a step further. After the paint was dry (it dries fast) I poured boiled linseed oil (You buy it that way. I did not boil it.) on each surface and rubbed it with some very fine wet/dry sandpaper on a sanding block. This step smoothed the painted surface, sealed it, and darkened it. The sandpaper also distressed the surface by rubbing paint off in some areas, as shown in this next picture.
Thus finished, the outside of the wood box is now silky smooth to the touch. James told me that Pa Ingalls used to use linseed oil to finish furniture followed by some bees wax, but I’m going to leave it as it is.
For my next project, I’m working on the room seen beyond the wood box in the first picture above. I need to put a fresh coat of paint on the ceiling and wallpaper the walls. In fact, that’s what I’m going to go do right now.......


.JPG)
.JPG)


.JPG)

.JPG)


.JPG)


16 comments:
It is beautiful Herrick! I have a 13 year old who is currently building a cabin in the woods - and wants to build his own furniture...any recommendations on books since you didn't write the one that I really need ? :)
Blessings!
Herrick, is the bottom of the woodbox a storage area, or just to lift the heighth of the wood? You did a great job.
Very nice woodbox, Herrick.
We use our woodstove to heat our home, and we just this past weekend installed a newer, small one in our family room that was just perfect for my 'frugal gene'. I'll write a post and put pics up for you to see...
But... I am with Cheri. Can you give me a list of good books for the boys to do further research and reading on building their own furniture? Thanks in advance...
Joyfully His,
Carla Lynne
Hi Herrick,
Do you know of any plan books for yoeman's furniture or just a detail book? Also, are there any books you know of that you would consider a must read before to help me build my house. I have seen several Larry Haun videos and was considering buying his book "The Very Efficient Carpenter'.
We've been using electric heat here for the last few years, but look forward to installing a woodstove in our home. Nice woodbox!
Great job, Herrick! You've got your own little furniture making business already- even it just stays inside the house for now.
This post reminds me that I need to find someone to buy firewood this year- we're running low and its getting colder- all the way down to 45 degrees! :-)
Lovely wood box! You are right. You don't need a shop full of tools to make wonderful furniture. All that magnificient and elegant colonial, furniture that sells for millions at auction, was made with fine hand tools. I rebuilt several classic old 100 year old hand planes, and use them. Many of my tools are handmade. By the way, back in that agrarian age, even skilled cabinitemakers repaired chicken coops, outhouses, and other mundane things they were hired to fix. they were not just building furniture. If you ever decide to get a stationary shop tool, get a good bandsaw. It will do more wooworking things safely, than anything else you can buy. You want to keep all your fingers. My motto is: "BANISH PARTICLEBOARD"!
Glad I found your blog. My family is just up the west lake road from you. I grew up working summers on the my uncles farm. I am in Dallas area at the moment and hopeful for an abundant "square foot" type garden next spring in my suburban backyard.
Hi TN Farmgirl--
Building a cabin is an excellent project for a 13-year old. No matter how it turns out in the end, he is going to get experience with using tools and making something. He is learning by doing. Wonderful!
Off hand, I don't have any recommendations for typical furniture-making books. I'll have to give that some thought. But I do have a recommendation. Last year I bought the book, "Making Rustic Furniture" by Daniel Mack. It tells how to make furniture using sticks and wood right from the forest. I found it to be a very inspiring book and my kids did too.
Hi Marci--
My original intention was to have the bottom of the wood box all the way down on the floor. But after gluing the back panel together, I cut it to size and discovered I had cut the height of it too short . That was a bit of a disaster, but such things happen, especially if you are in a bit of a hurry, which I was.
I kept a good attitude about it and told Robert that problems are nothing more than creative opportunities. So we used glue and wood biscuits (a biscuit-joiner cutter does come in handy when making furniture) to reattach the piece. Then we recut it to the proper length. But I did not think the rejoined boards would be sufficiently strong by themselves. That was when I decided to raise the bottom up. The bottom and the support cleat underneath it serve to reinforce the "mistake joint."
Then it occurred to me that I could cut a scoop out of the bottom to make four legs. It gives the piece a Shaker look. It did reduce the available capacity of the box but it is still big enough and you don't have to reach down as far to get the last pieces of wood.
Hi Carla Lynne--
Thanks for the compliment. I'll give some thought to posting a story about teaching children about woodworking. Another "wildwood" construction book that is inspiring and would give a parent and child some good projects to do is "Making Bentwood Trellises, Arbors, Gates, & Fences" by Jim Long.
I love the idea of using free-for-the finding natural materials to make useful things. This goes back to an old Mother Earth News magazine article I read when I was a teenager. It told how to make a bent willow chair. I didn't have any willow but there was another wood in my parents back woods (I think it was alder, maybe pin cherry, but I'm not sure). I made two bentwood chairs. My mother was astounded, as any mother would be. I was pretty astounded myself. The chairs were time consuming but relatively easy to make. Unfortunately, they stayed outside most of the time and fell apart after a couple of years. I really should dig that article out and make one of those chairs with my kids next spring!!
Hopeful Agrarian--
I know of no books for Yeoman Furniture. After all, I just coined the term! :-) But there are some good books out there and I will try to put together a list.
Larry Haun's videos are really good. The guy is a real master when it comes to efficiently building a house. He started in the building trades before they had power saws! I love how he cuts boards without marking a square line--just cuts freehand. And he drives 16 penny nails with one blow!! I have those videos somewhere and need to dig them out so my kids can watch them.
"The Very Efficient Carpenter" is a decent book. Actually, there are so many decent carpentry related books out there and most of them are produced by The Taunton Press. I have every issue of Fine Homebuilding magazine except two or three of the very early issues. Until a few years ago, i purchased almost every book they published.
I have this theory about buying how-to books. I buy almost all of them (well I used to). :-) Compared to, say, a typical college education, books and videos are cheap. I went to one year of a two-year building trades school. I took only one year because I didn't have the money to go two. And after one year, I was itching to get to work. The schooling was good but I've self-taught myself a whole lot more by reading the magazines (Fine Homebuilding and Fine Woodworking in particular) and books.
Hi Patti--
When you say you have "acres and acres" of woods, I have a hard time obeying the 10th Commandment. :-)
Jeremiah--
That's good news. You're going to love the wood heat.
Homesteadherbs--
Nice to hear from you. What kind of wood do you burn in Texas?
Hi Old Hound--
I like what you said. And you are correct about the bandsaw. I only have a little benchtop model but if I ever get more room to work, I'll get a floor model-- a REAL bandsaw. I bought it primarily for my kids because I want them to have a saw to cut wood but NOT my tablesaw. That is one dangerous tool for someone who is new to it, and even for someone who has been working with it for years.
And you are right about particleboard. It is the Industrial answer to real wood. I deal with particleboard in my regular job in the furniture factory. Wood made with glue and sawdust does not fit into the Yeoman Furniture category!
anonymous--
I'm glad you found my blog too! West Lake road is getting real close to me. Who are you? Who is your uncle? Good luck with the square foot garden!! hckimball@bci.net
Thank you very much for the bread crumbs- er, uh, books I can peruse and research. I am sure my sons will gobble these up. My boys read your post and have been busy- they are up to something. Do I see a Christmas gift being constructed in the garage? I am not allowed in there and my interest is piqued... :-)
Thanks again for sharing this, Herrick...
Warmly,
Carla Lynne
Lovely wood box. I'm not that clever would you consider making a sketch and materials list and posting it to your site?
I'm new at wood heat and I've found the worse thing so far is having the living room less presentable than before. A nice wood box would go a long way to tidying up the process.
Thanks.
Herrick, I hope you don't mind, but I linked to this post over on my new blog RockyCanyonRustics.blogspot.com It is a blog that will give how-to DIY advise for building willow furniture... yeoman furniture if there ever was any.
I've been reading your blog for several months now, and wait breathlessly for every posting. keep it up, great job!
Nice!
You might get a kick out of Autoprogettazione, which is the same idea, but with high-end Italian design, and fewer tools. Just 1x pine, a hand saw (all 90 degree cuts), a hammer, and nails.
The same guy (Enzo Mari) did great work with a scroll saw, too: "32 animals", and also "32 fish". I'm going to copy those when I have kids.
James-
Thanks for the link. I made two bentwood chairs when I was a teenager. Followed plans in a Mother Earth News article. They came out quite nice and everyone was amazed.
Joel-
I checked out Autoprogettazione and I thank you for letting me know about the work of Enzo Mari. The dining room table pictured at this link is fascinating for it's simplicity and visual appeal.
Herrick,
when I viewed the first picture of your wood box I thought it was the television stand from an entertainment center...having read parts of your websites I should have known better.
Thanks for your writings.
Tom
Mr. Kimball,
I thoroughly enjoy perusing your blog. Your pictures and prose made it much easier to process some chickens last month and we just put up some low tunnels for our overwintered spinach and lettuce. All but the homemade clothespins. We purchased some clips because my husband ran out of time. It's a good thing; we put them up this morning and it's snowing!
We are also trying your Thermos oats this evening.
In reading this post I am reminded of Dick Proenneke. Most libraries have his book, Alone in the Wilderness, and you might also be able to get his video which would be more beneficial to you as he films himself crafting his Alaskan cabin with hand tools. Absolutely fascinating.
Thank you ever so much for sharing all your wisdom and words.
Pam and Bill Baker
Post a Comment